This is the menu displayed within the right end of the header, and can be viewed by clicking on the toggle icon next to the avatar.
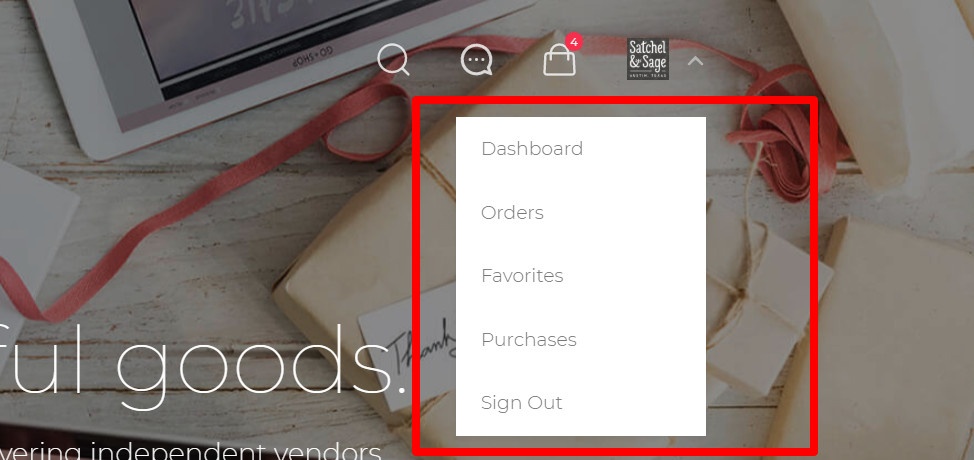
This menu, unlike other menus, is mainly used to render store-related data but there is no limitation to the type of menu items you can add.
You can also add a logout endpoint as a menu item, to enable users/vendors to easily log out of the store
To add items to this menu, you use the same steps you would a standard WordPress menu. If you do not have a menu created already, you will need to create one.
To create a new menu, click the “create a new menu” link, give the menu a name, and click the Save Menu button. Then assign this menu to the “Primary Menu” menu location.
Adding Items
After a menu is created, then detail items can be added to the menu. Choose items like custom links, pages, and categories, from the left column to add to the menu. If you have created custom post types or custom taxonomies those too can be added to menus. If you don’t see your custom post types or taxonomies, look under the Screen Options to make sure they are checked to be Show on Screen.
Please note that a hierarchy menu is not supported within this menu (parent/child relationship in the menu).
Further Reading:
- Create a Menu (WordPress.org)
- Add Menu Items (WordPress.org)
- Rearranging Menu Items (WordPress.org)